

Collections
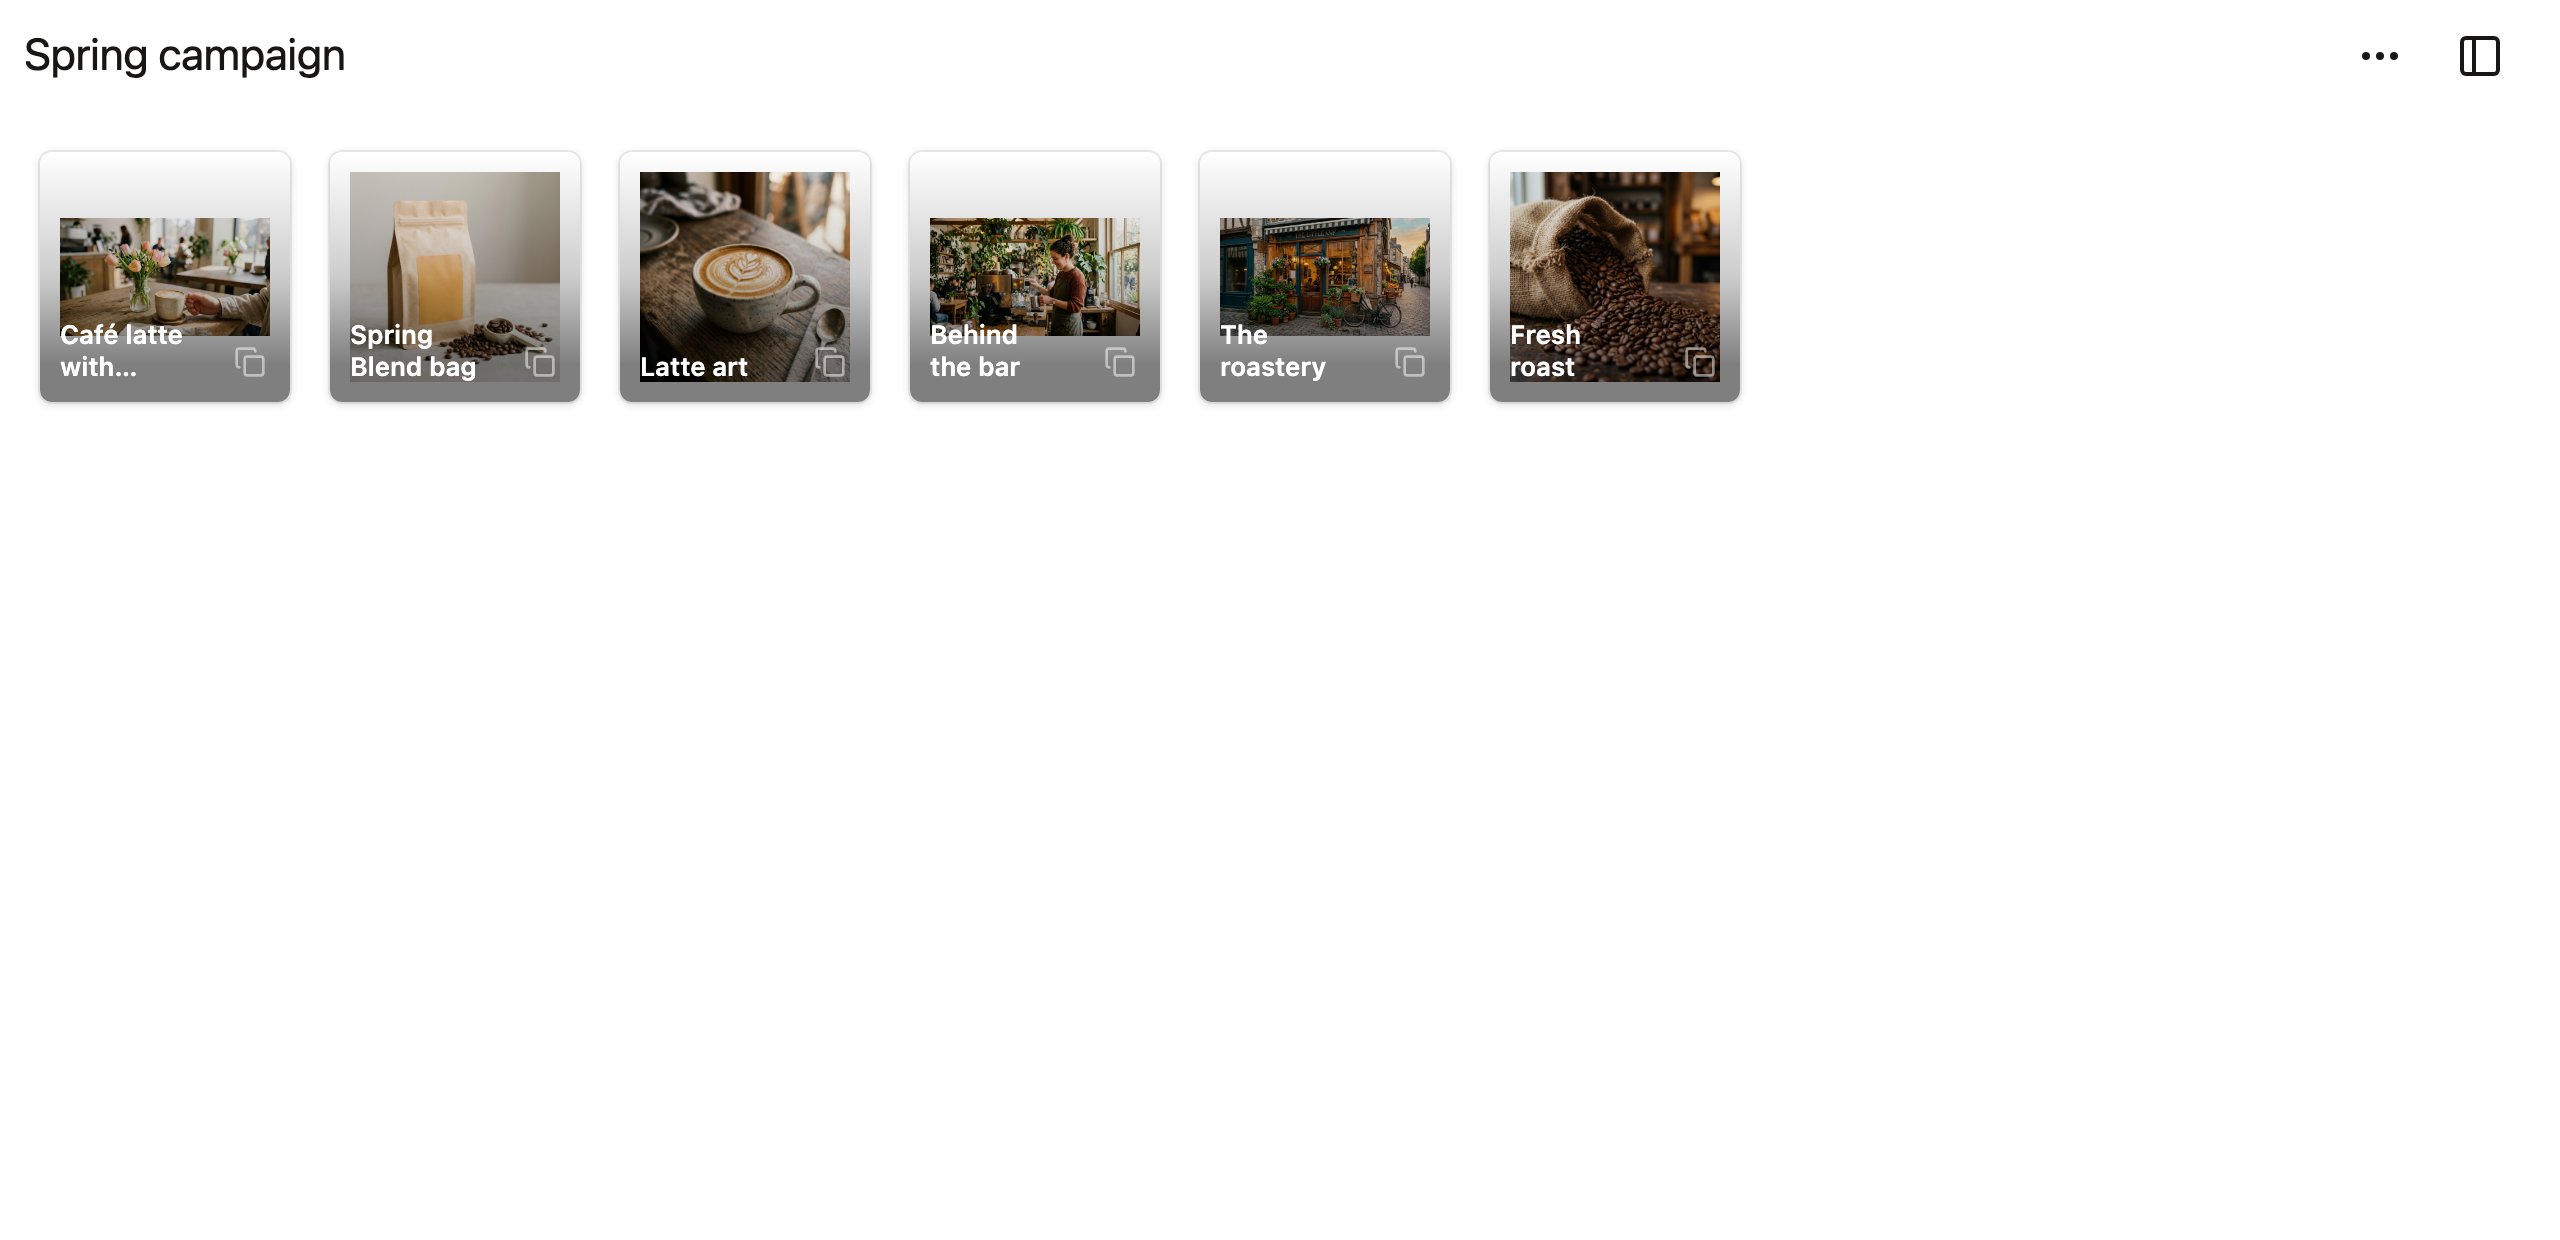
A collection is a named group of images. The sidebar lists all your collections, and clicking one filters the view to just those images. You might create collections for campaigns, product lines, seasons, or content types. Two collections exist automatically:- Default — where images land when you haven’t chosen a collection.
- Generated — AI-generated images land here automatically. This system collection is managed by Denada and is not available to Denada in chat.
Multiple named collections and image search are available on the Team plan.
Creating a collection
- Click New at the bottom of the collections list in the sidebar.
- Select New collection.
- Give it a descriptive name (e.g., “Spring 2026 campaign” or “Product photos”).
Moving images between collections
- Click an image to open the Image details panel.
- On the Overview tab, use the Collection dropdown to move it.
Publishing images to Denada
Publishing controls which images Denada can see and use when building projects in chat. Each collection has a publish control:- In the sidebar, hover a collection to reveal its publish button.
- Or open the collection’s menu and use the Available to Denada toggle.
Uploading images
When you add images, Denada reviews each one and generates descriptive metadata so it can find and use them later.From your device
- Open a collection from the sidebar.
- Drag and drop files directly into the browser window.
- Or open the collection menu and choose Upload images.
From a URL
Open the collection menu and choose Add image from URL, then paste a direct image URL.From Figma
Choose Import from Figma in the collection menu for instructions on sending images straight from Figma using Denada’s plugin. See the Figma integration. When you upload images, Denada automatically:- Generates a descriptive appearance, alt text, and keywords.
- Suggests presentation settings so the image looks right in projects.
Image details
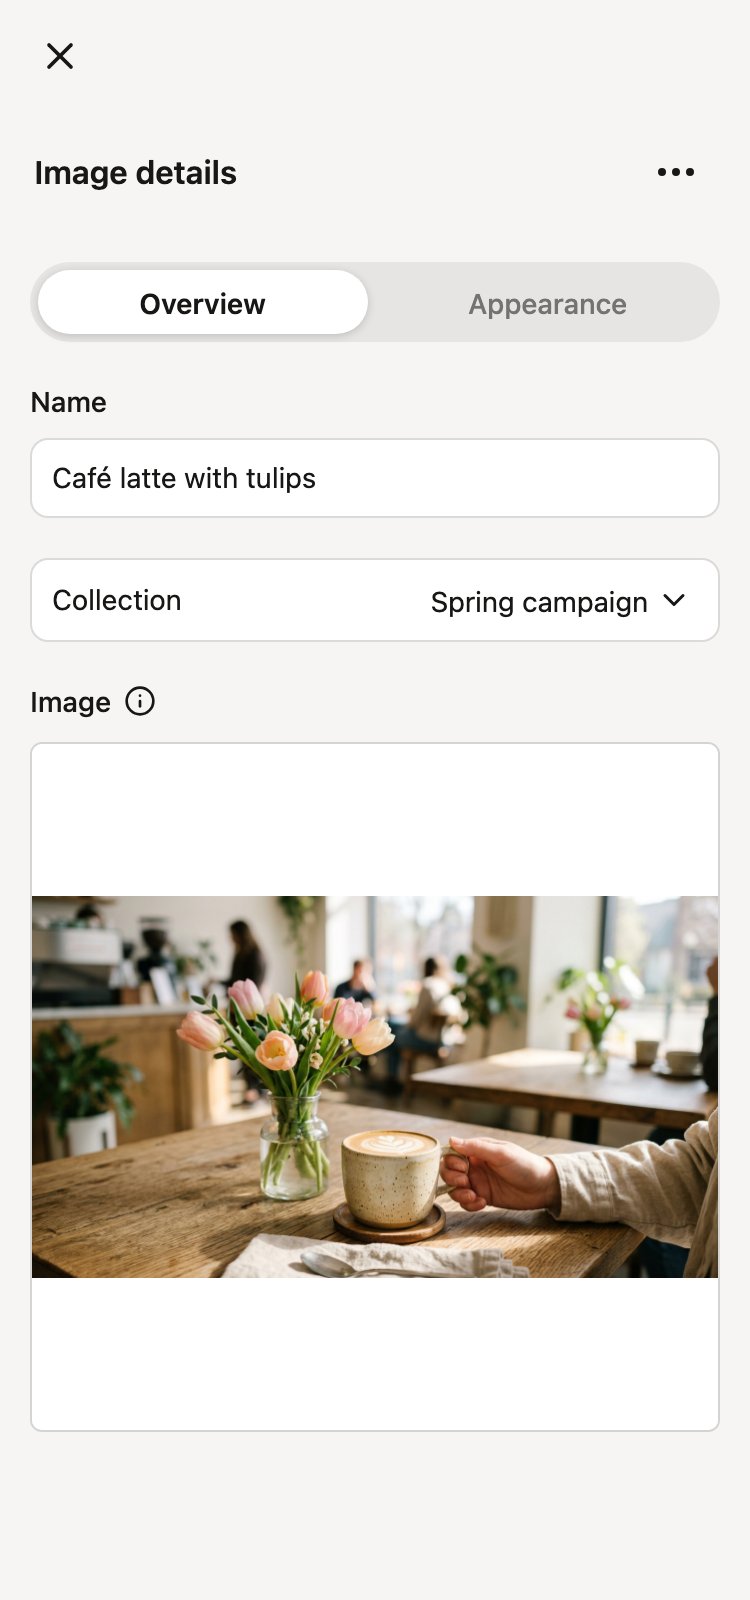
Click any image to open the Image details panel. It has two tabs:Overview
- Name — the image’s display name (auto-generated on upload, editable).
- Collection — which collection this image belongs to. Use the dropdown to move it.
- Image — a preview with editing actions (see below).
Appearance
- Instructions — tell Denada when or how to use this image (e.g., “For newsletter hero images”).
- Appearance — a description of what’s in the image, since Denada can’t “see” it during chat.
- Alt Text — accessibility text for screen readers and fallback display.
- Keywords — tags used for search (e.g., “students, library, books”).
- Metadata — plain-text notes from importers or integrations.
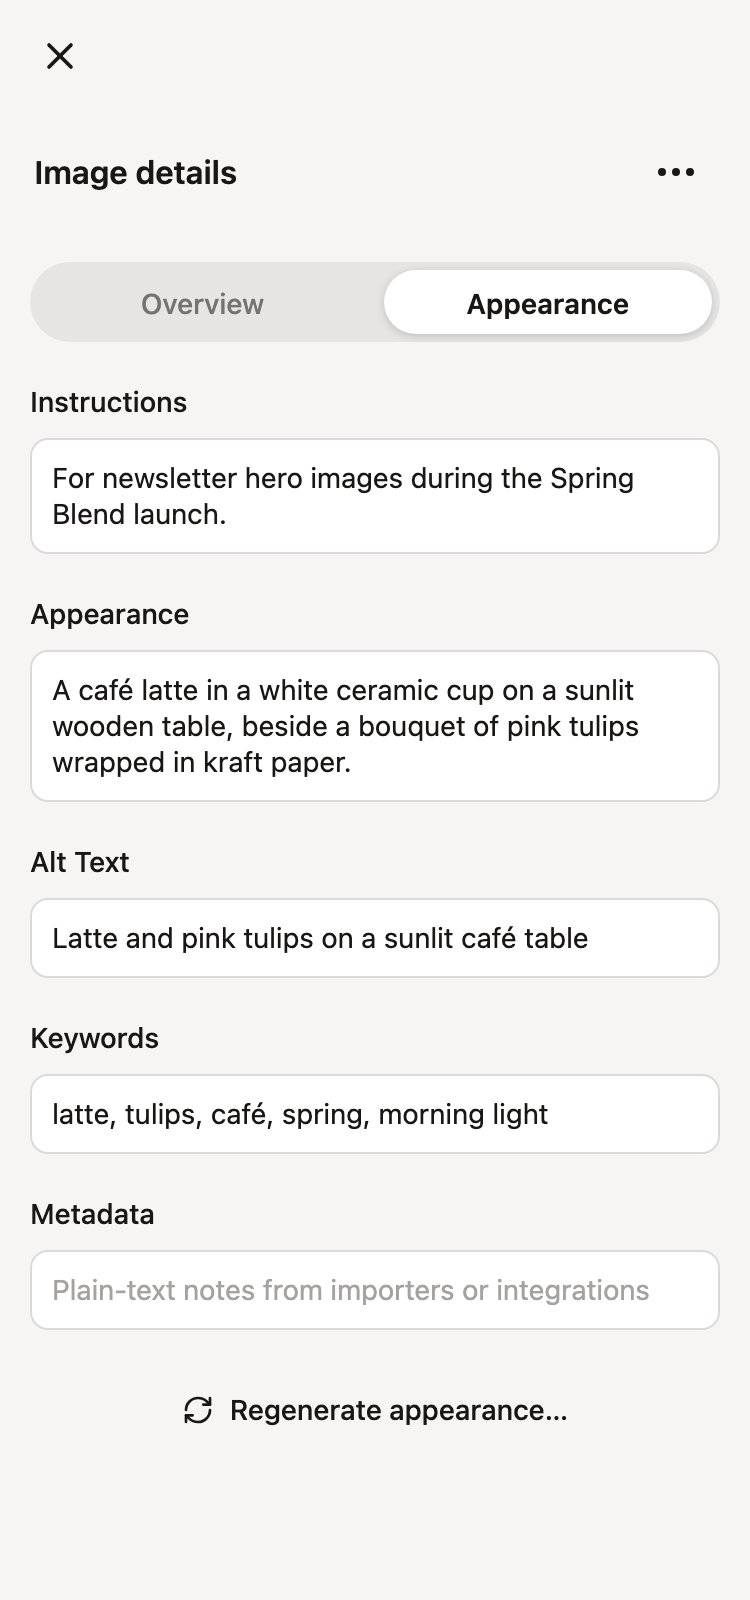
Image actions
Click the image preview in the details panel to access these options:- Crop image — adjust the crop area and reposition. The crop applies to this image everywhere it’s used.
- Image format — switch between JPEG, GIF, and PNG.
- Preview on dark background — check how transparent PNGs or light images will look on dark.
- View fullscreen — opens the image at full size.
- Open in new tab — opens the hosted image in a new browser tab.
- Copy image URL — copies the hosted image URL to your clipboard.
Searching
The Search page in the Images sidebar searches across your whole library, with two modes:- Similarity — semantic search that understands descriptions, like “Product in a warm interior setting”.
- Keywords — matches model numbers, product names, or keywords exactly.
Image search is available on the Team plan.
Best practices
- Organize with collections. Group related images by campaign or theme.
- Publish deliberately. Only published images are available to Denada — keep works-in-progress unpublished.
- Review generated metadata. The automatic descriptions are a great start, but a quick review ensures accuracy.
- Add instructions to key images. A short note like “For newsletter hero images” helps Denada place images well.
Collections are shared across your entire team. Any team member can browse, add to, or organize images in any collection.