

The ⋯ menu
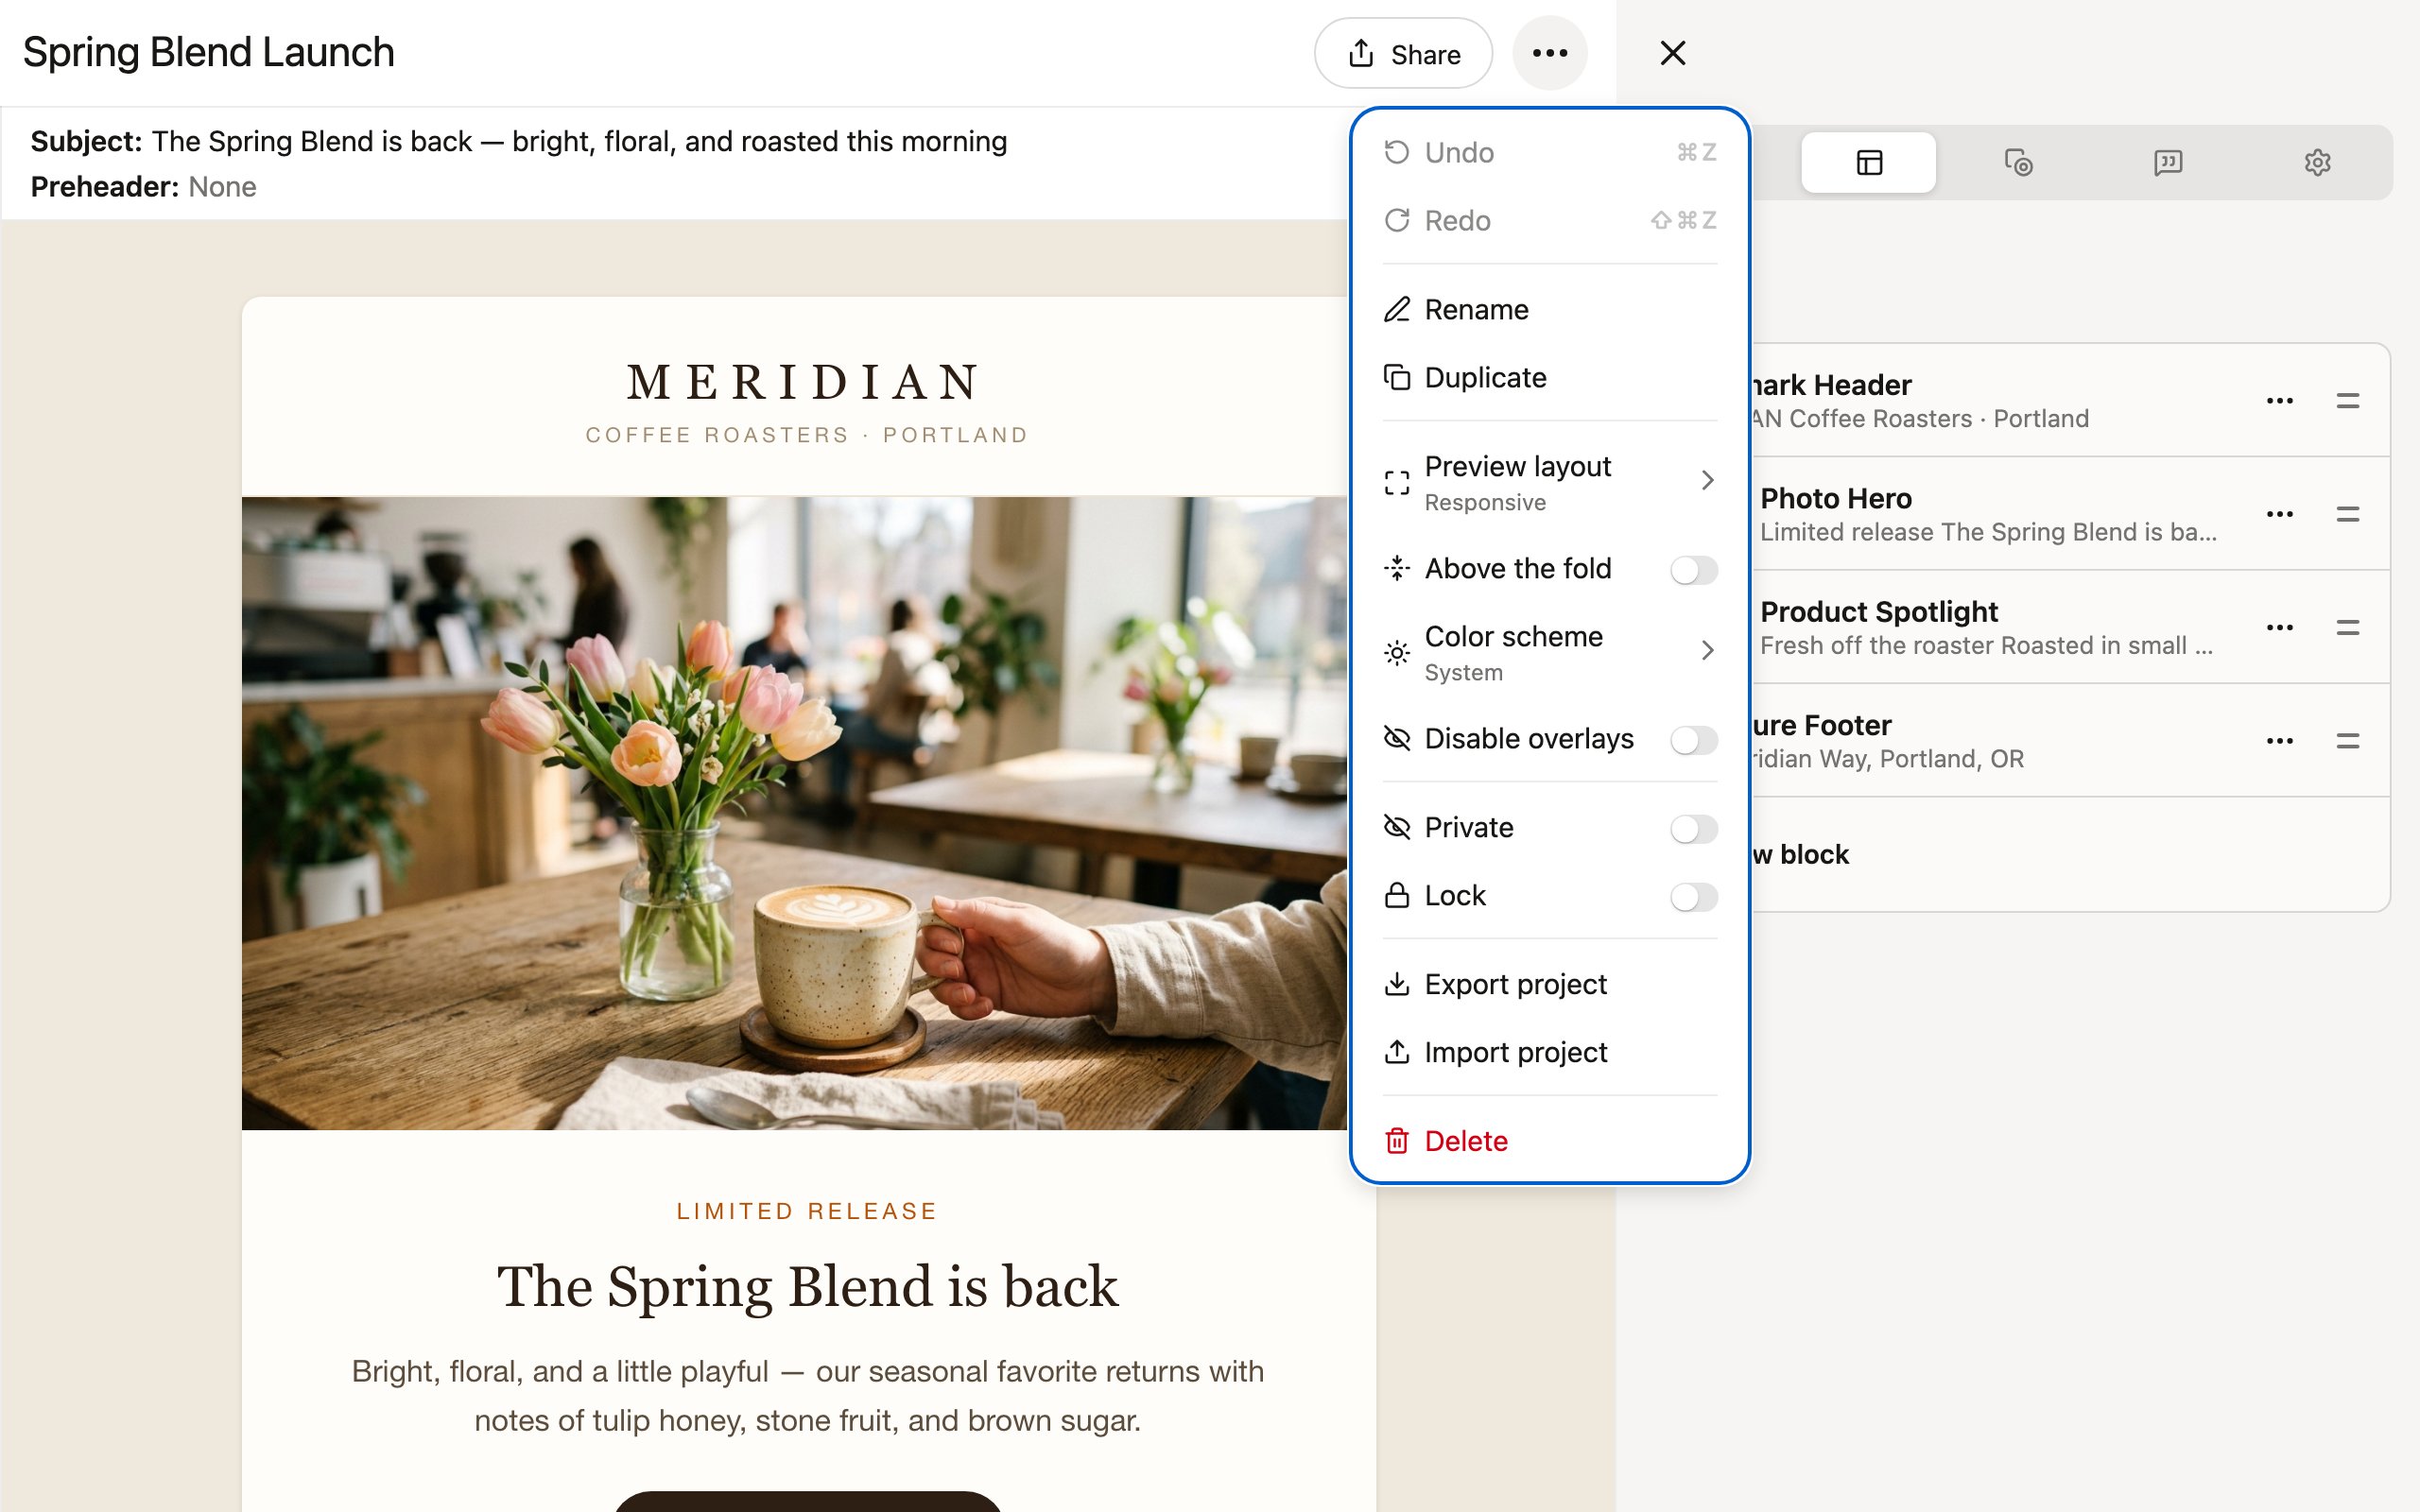
Undo / Redo
Quick access to undo and redo, with keyboard shortcuts shown (Cmd+Z / Cmd+Shift+Z on Mac, Ctrl+Z / Ctrl+Y on Windows). The menu items describe the change they will undo or redo.Rename
Change the name of your project. This is the title shown in the Projects list and at the top of the editor.Duplicate
Create a copy of the entire project, including all blocks and parameter values. If the project has variations, a checkbox lets you include them in the copy — otherwise they can be regenerated later.Preview layout
Control how the preview renders on the left side of the editor:- Responsive (default) — the preview adapts to the width of your editor window, giving you a realistic sense of how the email will look.
- Desktop — fixed 1280px-wide preview.
- Tablet — fixed 800px-wide preview.
- Mobile — fixed 414px-wide preview.
Above the fold
Overlay dashed guides showing the approximate fold in popular email clients (or browser sizes, for landing pages) — a rough gut-check for what recipients see before scrolling. Toggle with Ctrl+F. See the editor interface for details.Color scheme
Switch the preview between Light and Dark to see how your email renders in clients that support dark mode. System (the default) follows your OS preference.Disable overlays
Turn off the block selection overlays and hover indicators on the preview (Ctrl+O). This lets you click on elements in the rendered preview directly — useful when you want a clean view without any editor UI on top.Private
Hide this project from your team in the Projects area. Only you (and admins) can see a private project.Lock
Prevent the project’s content from being edited. This is useful when a project is out for review or has been finalized — comments can still be added, but no one can accidentally change the content. Toggle the lock off when you need to make changes again. Moving a project to a status marked completed locks it the same way, and moving it out of that status unlocks it — including a lock set by hand.Export project
Download the project as a.project file that can be imported into another team.
Import project
Replace this project’s contents with an uploaded.project file, keeping its current library. A version of the current state is saved first so you can restore it later.
Delete
Permanently delete the project. This removes it from the Projects list.The Options tab
The Options tab in the sidebar holds content-level settings.Email options
For email projects, the tab is titled Email options and includes:- Subject — the email’s subject line.
- Preheader — the preview text shown after the subject in most inboxes.
- Tracking — click to open the UTM parameters dialog, where you can set Source, Medium, and Campaign values. When enabled, UTM parameters are added to all links in the email, and per-link Content and Term fields become available in the Edit link dialog.
Theme
If your library exposes project-wide theme parameters (colors, fonts, and so on), they appear here under a Theme heading.Versions
Click View history to browse and restore previous versions of the project.Version history requires the Team plan — on other plans this cell reads Upgrade to view history.
Library
Shows which library (and version) the project is built on. Click it for library actions:- Change library — switch to a different library without losing your changes. Your blocks are matched up by name where possible.
- Change version — pin the project to a specific version of the library, or track the latest draft.
- Update — pull in the latest library changes. This item only appears when an update is available; a blue Update available badge shows on the library cell and a notification dot appears on the Options tab itself so you don’t miss it.
- View library — open the library in a new tab (shown if you have library permissions).