

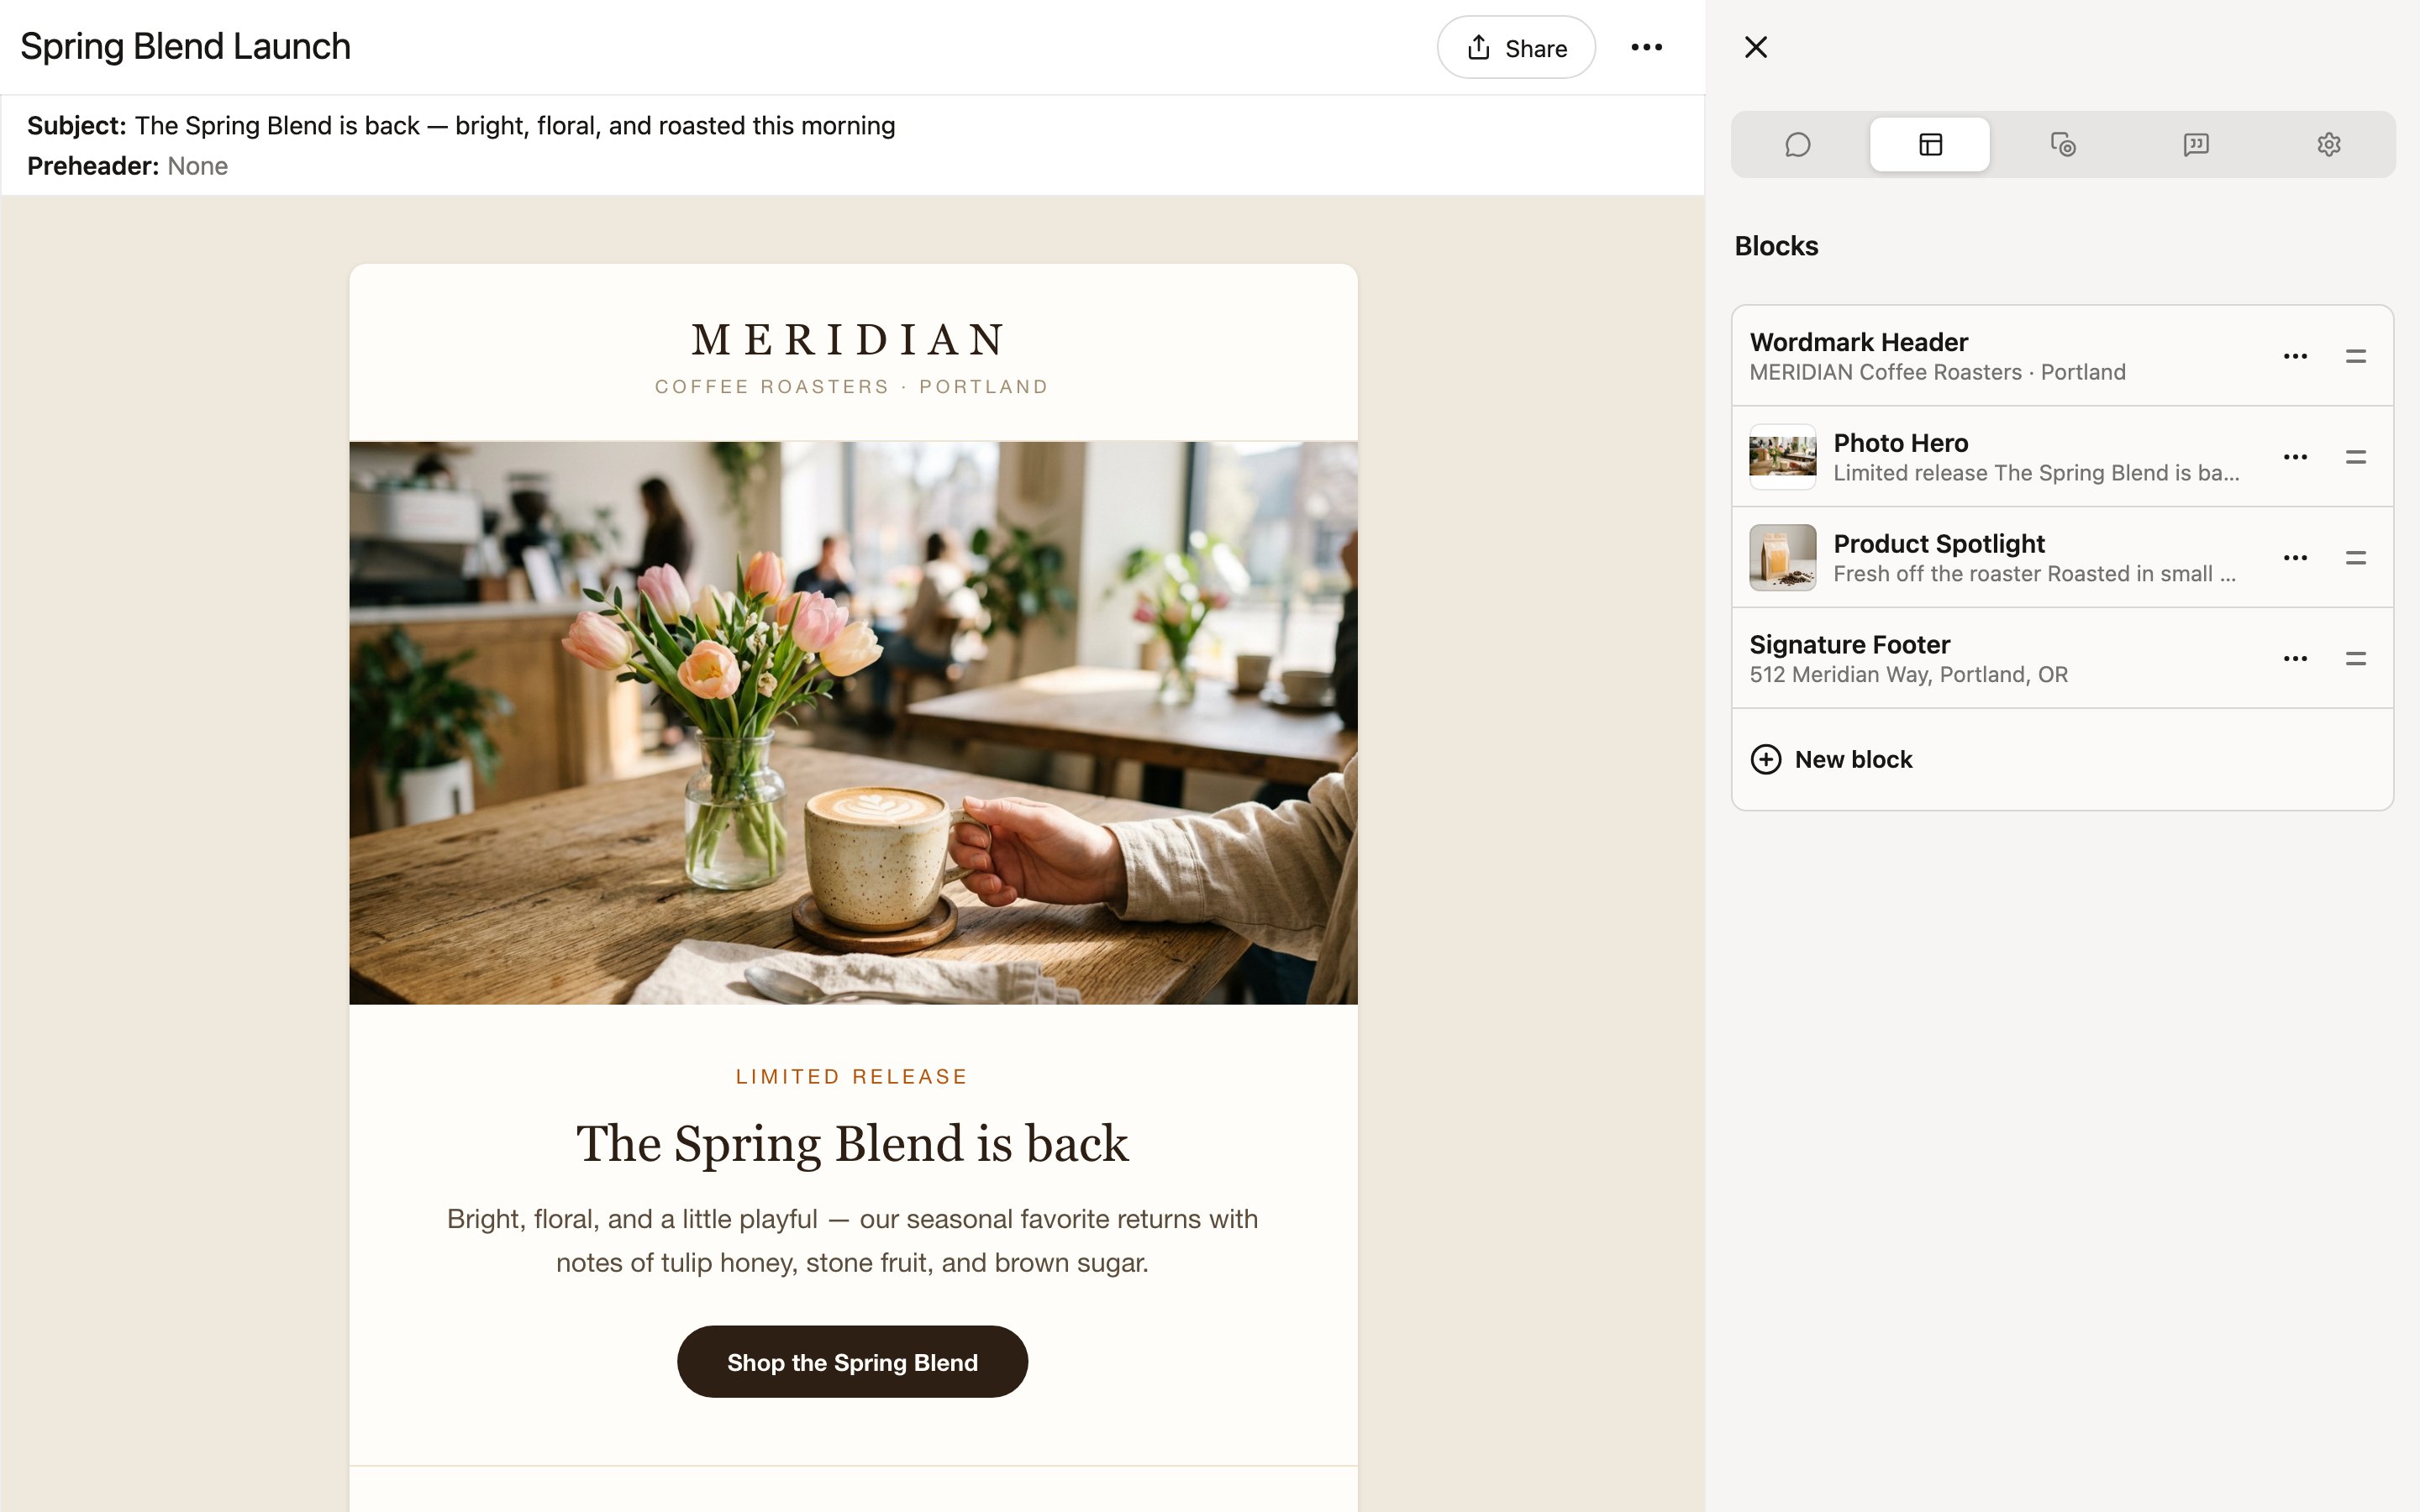
Editor layout
The editor is organized into two main areas:- Preview area (left) — a live rendering of your project that updates as you make changes. Email projects show the subject and preheader at the top, and the toolbar includes a Share button and a ⋯ menu for additional actions.
- Sidebar (right) — a panel with tabs for Chat, Edit, Variations, Comments, and Options. Switch between these tabs to iterate on your project from different angles.
Getting content into the editor
There are three ways to start working on a project:- Create a new project with chat — click + New in the top-right corner and choose New project. Describe what you need in the chat, and Denada builds the project in the preview area.
- Create a new project manually — click Skip and go to editor from the chat screen to start with a blank project. You will see an empty preview area with an Add first block… button, and the Edit tab will show a New block button. Click either one to start adding blocks from your library.
- Open an existing project — select any previously saved project from the Projects list in the left sidebar.
Block-based editing
Projects in Denada are built from blocks. Each block is a self-contained section — a hero image, a text section, a call-to-action button, a footer, and so on. Blocks expose parameters that you can edit, such as:- Headline and body text.
- Images and alt text.
- Button labels and URLs.
- Background colors and spacing.
Sidebar tabs
The right sidebar contains several tabs:Chat
Chat
Continue your conversation with Denada without leaving the editor. Ask for changes, request new sections, or refine the project through natural language. Denada applies changes directly to the project in the preview area.Learn more about the chat interface
Edit
Edit
Browse and manage the blocks that make up your project. Add new blocks from your library, reorder them, or remove blocks you do not need. Select a block to see its editable parameters — text, images, links, colors, and more.Learn more about working with blocks
Variations
Variations
Generate multiple versions of your project automatically. Variations let you explore different copy, tone, or layout options and export them all at once for translations, personas, or A/B testing.Learn more about variations
Comments
Comments
Leave internal notes for your team or collect feedback from external reviewers. Comments can be tied to specific blocks and toggled between public and private visibility.Learn more about comments and collaboration
Options
Options
Project-level settings: the subject, preheader, and UTM tracking for email projects, theme parameters, version history, and the library your project is built on.See the full Options reference
Preview layouts
The ⋯ menu’s Preview layout submenu switches the preview between four breakpoints:- Responsive (default) — the preview fills the available width of your editor window.
- Desktop — fixed 1280px-wide preview.
- Tablet — fixed 800px-wide preview.
- Mobile — fixed 414px-wide preview.