

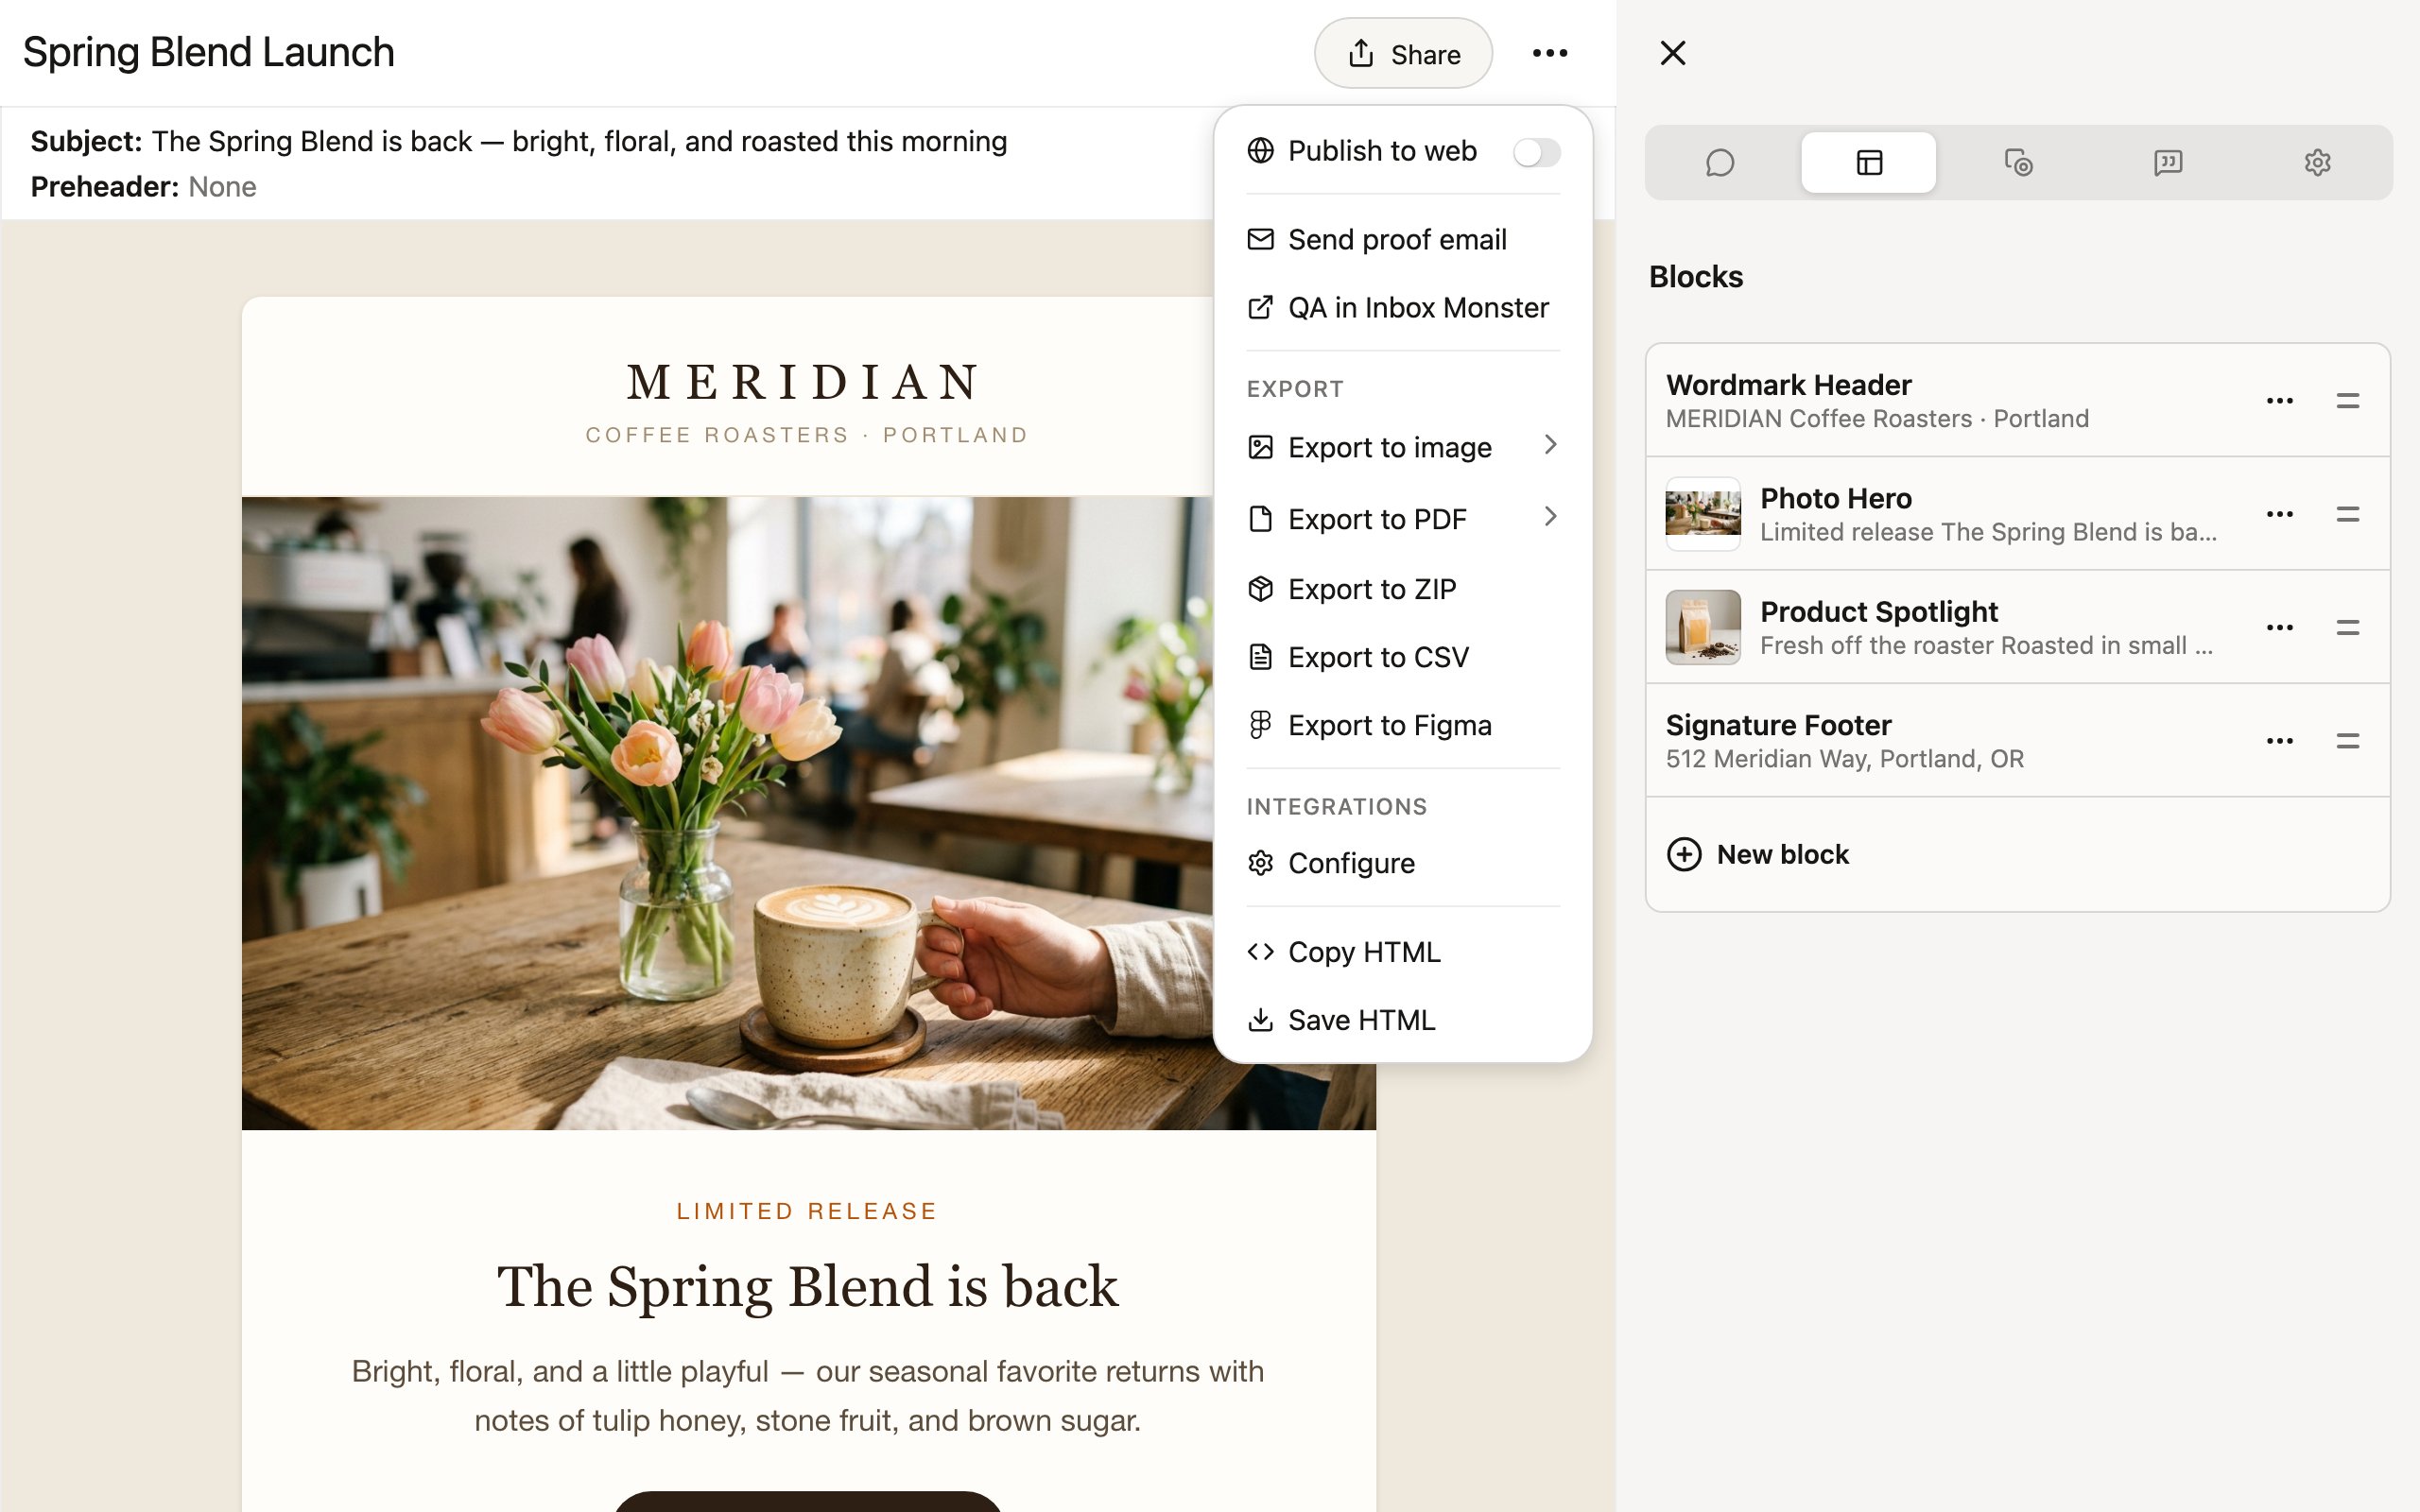
Publishing and proofing
The top of the Share menu covers sharing without a download:- Publish to web, View on web, and Copy link put your project at a public URL — see publishing to the web.
- Send proof email and QA in Inbox Monster let you test how your email looks in real inboxes — see proofs & QA.
Export all variations
If your project has variations, an Export all variations toggle appears at the top of the Export section. Turn it on to include every variation in export formats that support multiples (CSV and ZIP). When off, only the current variation is exported. If you’re viewing a specific variation or an older version from version history, the Share menu shows a banner like “Exporting Spring sale only” so you always know exactly what you’re about to export.Export to image
Export to image opens a submenu with three ways to render your project as PNG files:- Two-up — Desktop and mobile renders both views side by side in a single image, great for visual comparison in reviews and presentations.
- Single — renders one image at a specific breakpoint: Desktop, Tablet, or Mobile.
- Blocks — exports each block as a separate PNG (rendered at your chosen breakpoint width), delivered as a ZIP. Useful for handing individual pieces to designers or other tools.
Export to PDF
Export to PDF offers similar choices:- Two-up — Desktop and mobile views side by side.
- Image — a pixel-perfect PDF at your chosen breakpoint, rendered as an image. Every layout renders exactly as designed, but the text isn’t selectable.
- Native — a real PDF with selectable text, rendered at the breakpoint width as a single long page. Great for desktop and tablet widths; narrow mobile layouts can be hit or miss.
Export to ZIP
Export to ZIP downloads an archive containing your project as HTML along with its images. With Export all variations on, each variation is included.Export to CSV
Export to CSV produces a spreadsheet with all your content values in columns. Before exporting, you can enter Formatting instructions (optional) — for example, “Put languages in columns and values in rows” — and Denada organizes the output accordingly. Your instructions are remembered in your browser for next time.Export to Figma
Export to Figma opens a short instructions dialog: exports go through the free third-party html.to.design Figma plugin, and the dialog gives you a clean, copyable link to paste into the plugin so your project imports without any extra page UI.Copy HTML and Save HTML
At the bottom of the Share menu, two quick options give you direct access to the rendered HTML:- Copy HTML — copies the rendered HTML to your clipboard so you can paste it directly into your email platform.
- Save HTML — downloads the rendered HTML as a file.
Integrations
The Integrations section lets you push projects directly to your connected email platforms.- Export to [platform] — sends the rendered project to a connected platform (for example, Export to Iterable). The options shown depend on which integrations your team has configured.
- Configure — opens integration settings where you can connect new platforms or manage existing ones.
You need to connect your email platform before it appears in the Share menu. Click Configure to set one up, or see the integrations overview.