What you need
- A Denada project with an email ready to push
- A Salesforce Marketing Cloud account with administrative permissions (to create an Installed Package)
Step 1: Configure an SFMC Installed Package
Create a dedicated package in SFMC for the Denada integration:- Log in to your Salesforce Marketing Cloud account.
- Navigate to Setup.
- Under Platform Tools, select Apps, then click Installed Packages.
- Click New to create a new package.
- Name the package “Denada Integration” and provide a description (e.g., “Package for Denada SFMC data synchronization”).
- Click Save.
- Under the new package details, click Add Component.
- Set the component type to API Integration, then choose Server-to-Server.
- Define the required permissions:
- Documents & Images: Read, Write
- Assets: Read, Write
- Saved Content: Read, Write
- Email: Read, Write
- Provisioning Accounts: Read
- Click Save.
- Copy the Client ID and Client Secret generated for this component — you will need them in the next step.
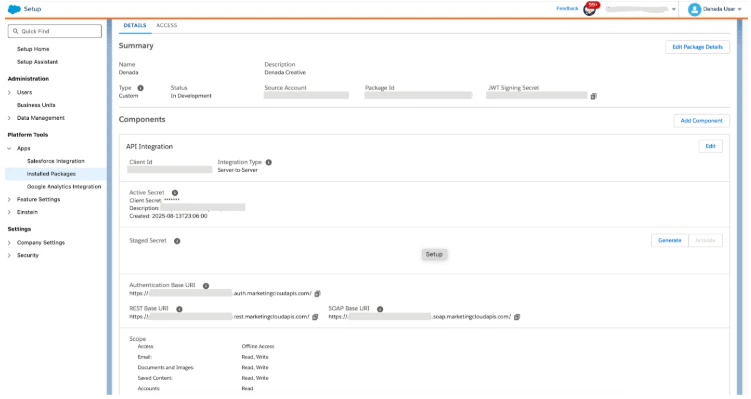
Your SFMC Installed Package should look like this when complete.
Step 2: Connect Denada to Salesforce
- In Denada, open your team’s Settings page, find the Integrations panel, and click Add integration (manager access required). You can also get there from any project via Share > Integrations > Configure.
- Select Salesforce from the list.
- Enter the following details:
- Click Validate to ensure the integration is working.
- Click Save.
Push an email to Salesforce
When you are ready to send a project to SFMC:- Open the project and click Share.
- Under Integrations, select Export to Salesforce (if you have several Salesforce configurations, each appears with its configuration name).
- Choose the destination Content Builder folder (defaults to your configured default folder, but you can pick a different one).
- Give the asset a name — this is how it will appear in Content Builder.
- Choose your upload type:
- Upload HTML only — uploads HTML with Denada-hosted images. The fastest option.
- Upload images to same folder — uploads HTML and hosts your images in SFMC, replacing image URLs in the HTML with SFMC-hosted URLs. All files go in one folder.
- Upload images to subfolder — same as above, but images are placed in a nested subfolder (you choose its name) to keep things organized.
- Click Export here.
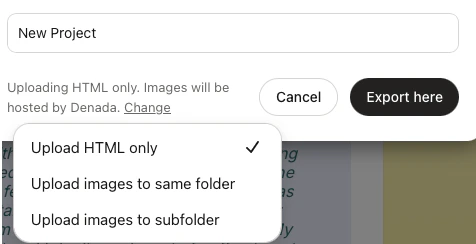
Choose how images are hosted when exporting to SFMC.
How updates work
Before exporting, Denada checks the destination folder for assets with the same names (the email itself, and any images being uploaded). If there are matches, you’ll see a Replace existing assets? confirmation listing what will be updated — confirm to replace them in place, or go back and change the folder or asset name. Re-exporting with the same name and folder updates the same Content Builder assets rather than creating duplicates.Troubleshooting
'Invalid credentials' error during validation
'Invalid credentials' error during validation
Make sure you are using a Server-to-Server API integration, not a Web App or Public App type. Double-check that the Client ID, Client Secret, and Tenant subdomain are correct.
Export fails with a permissions error
Export fails with a permissions error
Verify that your Installed Package has the required permissions: Documents & Images, Assets, Saved Content, and Email all need Read and Write access.
Images not appearing in SFMC
Images not appearing in SFMC
If you chose Upload HTML only, images are hosted by Denada and should display automatically. If you chose one of the SFMC-hosted options, check that the Assets permission includes Write access.